
Exposure control
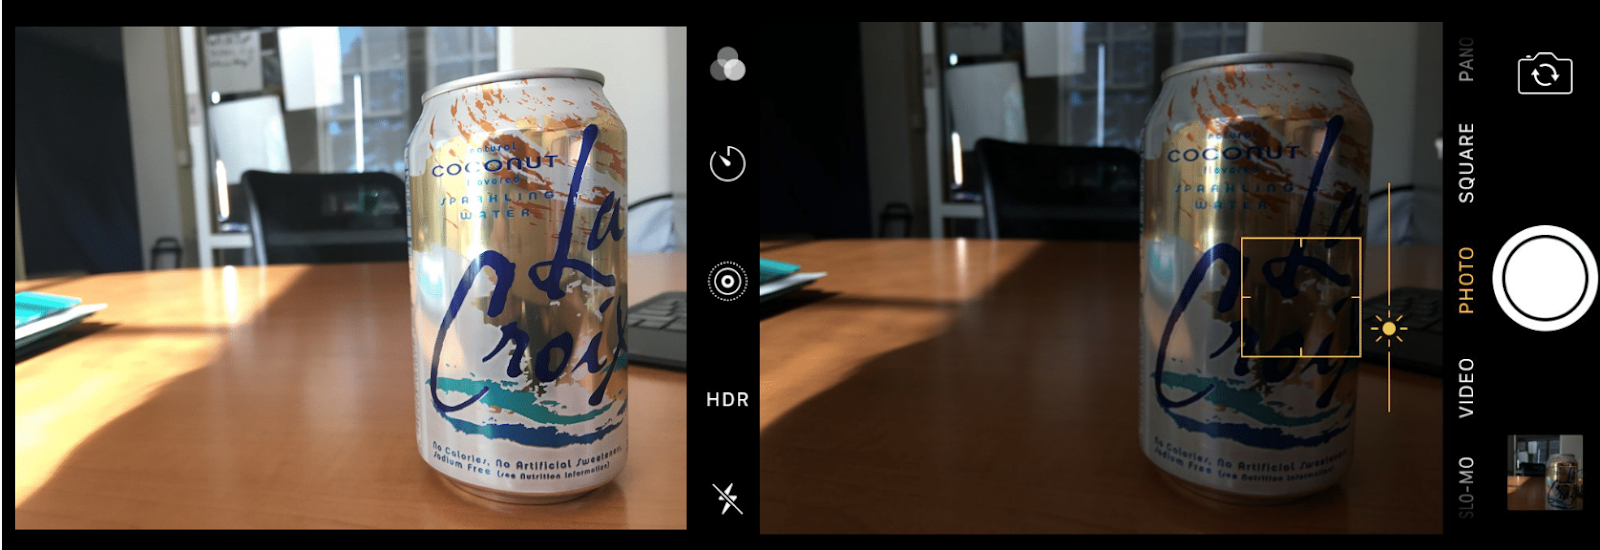
Using the Volume + button (Apple iPhone)
Holding your smartphone horizontally and actuating the shutter using the “Volume +” button on the side of your phone allows the photographer more control over the stillness of the phone itself (preventing camera shake)
Using headphones as remote release (Apple iPhone)
Similarly, if the photographer would like to take a self-portrait or have more control over the stillness of the phone, using the headphones that came with your phone and pressing the “Volume +” button to take a photo works great.
Using the rear camera only
The rear camera of all smartphones produces a higher resolution photo which is ideal for printing and manipulation purposes. Please do not take photos for ATU needs with the front facing camera.
Don’t zoom in!
Similarly, zooming in with a smartphone minimizes the quality of the resulting photo and pixel size is diminished.
Don’t use on-camera flash.
Light and use of directional light is what makes a photo interesting to the viewer. Filling the scene with bright, direct light (like that from a small camera flash) isn’t particularly pleasing to the eye.
Composition:
Rule of Thirds, illustrated below:

By having your main subject positioned at the intersection of understood “thirds” of your composition, immediately your composition is pleasing and easy for the viewer to understand your main subject clearly.
Symmetry, illustrated below:

Symmetry is aesthetically pleasing to the eye and humans are hard-wired to seek it out in imagery to find balance.
Proper Cropping:
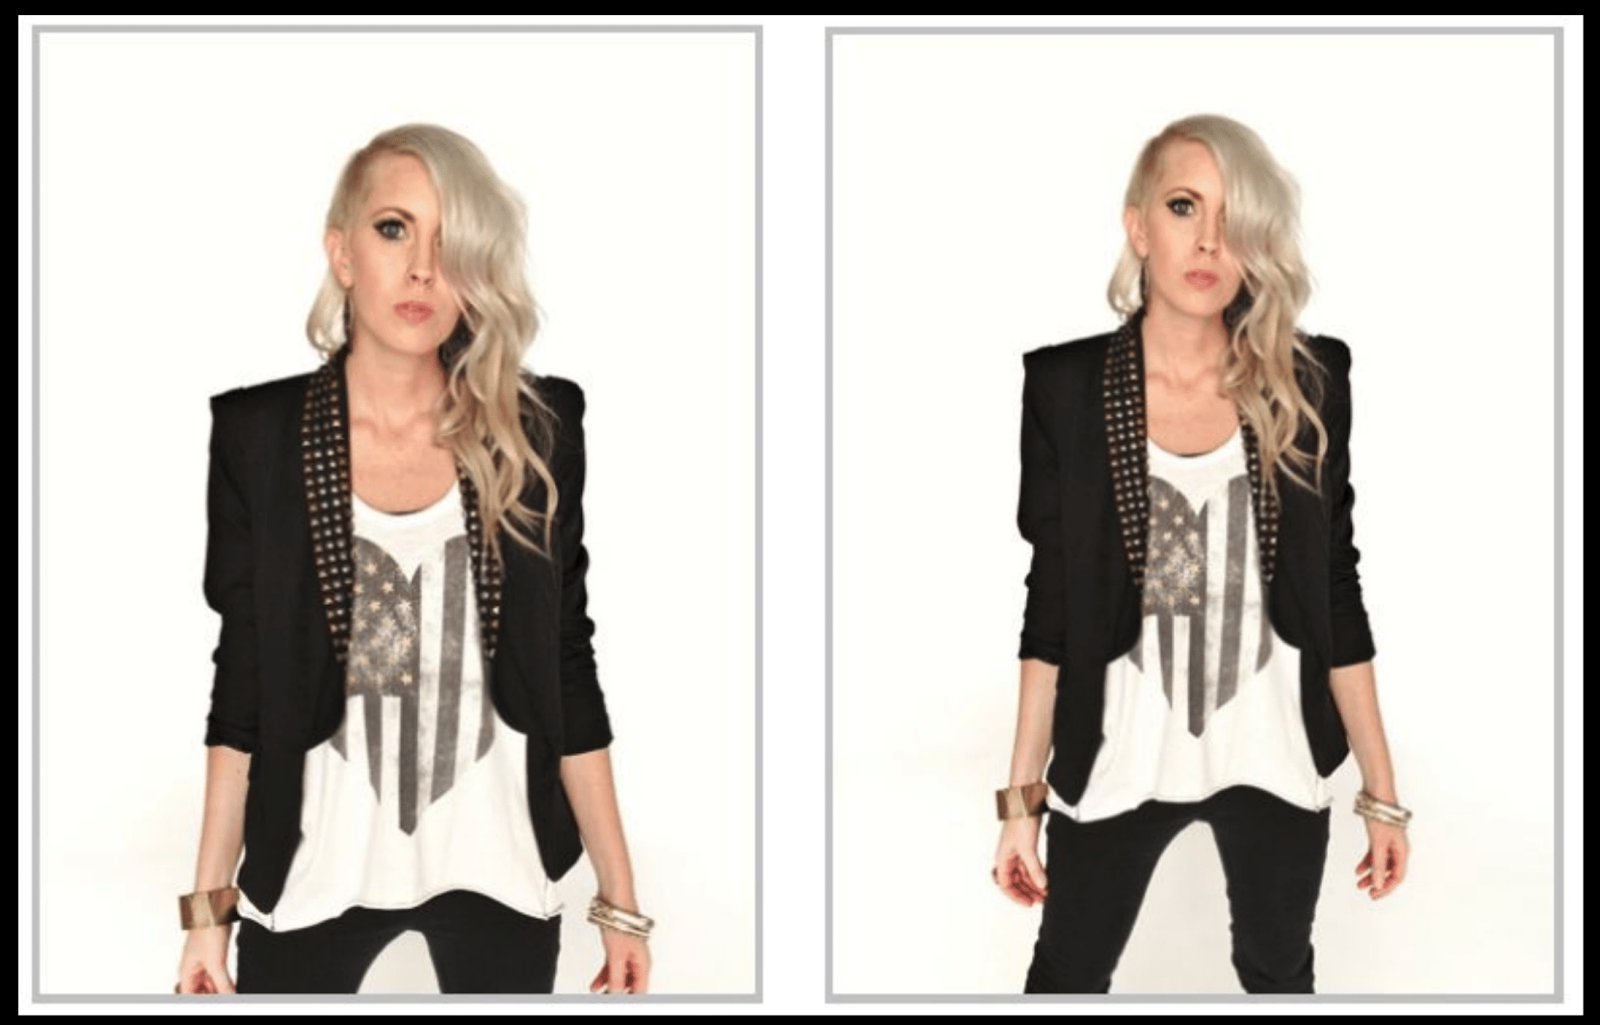
Be aware of where your crop is when photographing people. Try to aim to crop between joints (wrist, elbow, knee) to avoid making your subject look as if they’ve sustained an injury. Make sure both hands are visible.


Angles of View:
Eye Level: allows your viewer to have the same perspective as your subject.
High Angle: Portrays the subject as small compared to the surroundings. Can give the feeling that the subject is “less than” the viewer.
Wide Angle: Puts emphasis on the foreground of the image.
Low Angle: Can give the feeling that the subject is “larger than life”
Bird’s Eye View: A heavenly or omnipresent perspective. An odd view, given humans cannot naturally view the world this way.
Lighting:
Directions of light
Front light: how we naturally see subjects
Side light: adds dimension to face
Back light: creates a halo effect and separates the subject from the scene
Main vs Fill light
Main light sources can include: a window with a sheer covering or lamp with large lampshade.
Avoid direct lighting as a main light source given it can be harsh in a portrait. The larger the light source: the more pleasing the quality of light is on skin.
Fill light can be added alongside the main light source to add dimension. Not required!
Process for using university photos
If you’d like to use university taken photography for your social media channels, the easiest, most immediate access would be to utilize Flickr.
If you have a specific need, look through our archive. This would be for more advanced planning purposes.
How to choose the right photos:
Think about the “thesis” of your post:
Who is the audience?
What “color” is the language written in?
Diversity is important and should always be considered.
The images we put out on behalf of the university portray who we want our students to be. All accounts that operate on behalf of the university are a part of that conversation.
Consider age, sex, race, sexual orientation, gender.
Don’t “over” diversify. If you have questions about our current diversity ratio on campus, reach out to our team. We make every effort to consider this ratio when selecting photography for all digital and print pieces.